When you form a company with us you, get free and immediate access to the Client Portal. This tool allows you to take care of various admin tasks for your limited company, and manage the services that you have in place with us. In this post, we’re going to take you through exactly what you can do with the Client Portal.
Logging in to the Client Portal
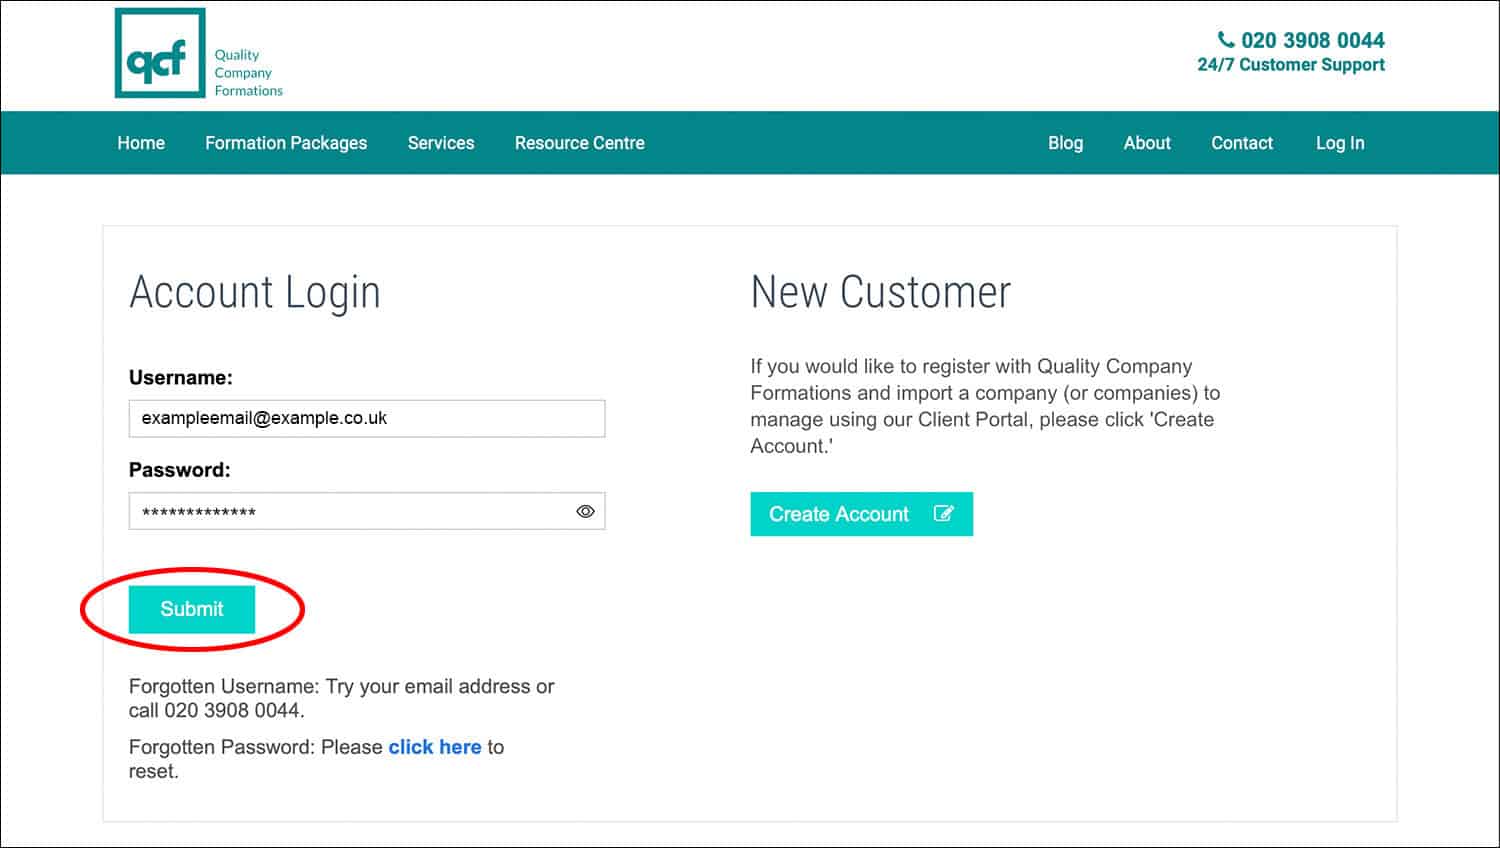
You will have provided a ‘Username’ and ‘Password’ when forming your company with us. Enter these details on the ‘Account Login’ page (accessible from the top-right of our homepage) and select ‘Submit’ to access the Client Portal.
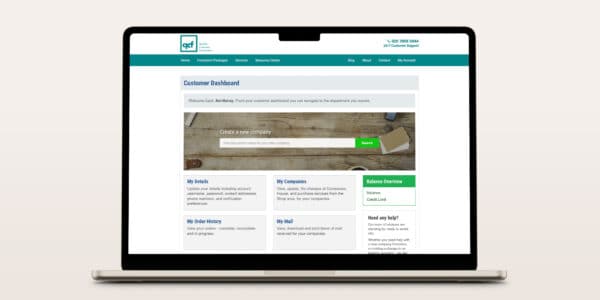
Welcome to the Customer Dashboard
You’ll now see the main hub area of your account. This area is broken up into 8 clickable sections (My Details, My Companies, My Order History, My Mail, My Invoice History, My Services & Renewals, Card Management, and Import a Company).
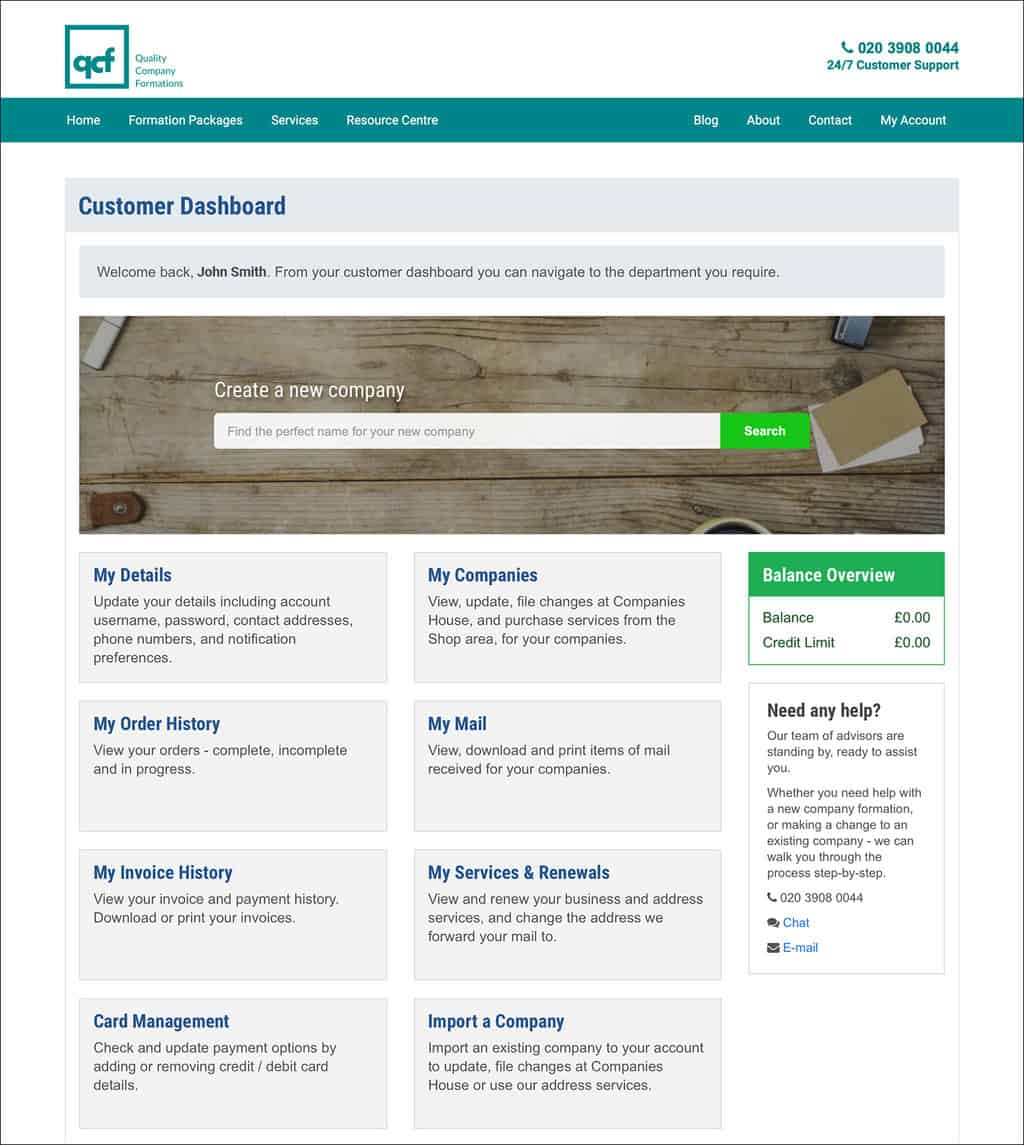
This page also includes a ‘Find Quick Answers’ area dedicated to common questions we receive (and the answers), such as “How do I renew my address service(s)?”, “What is the confirmation statement and do I need to file one?”, and more.
Now, let’s look at what you can do by clicking on the dashboard boxes.
My Details
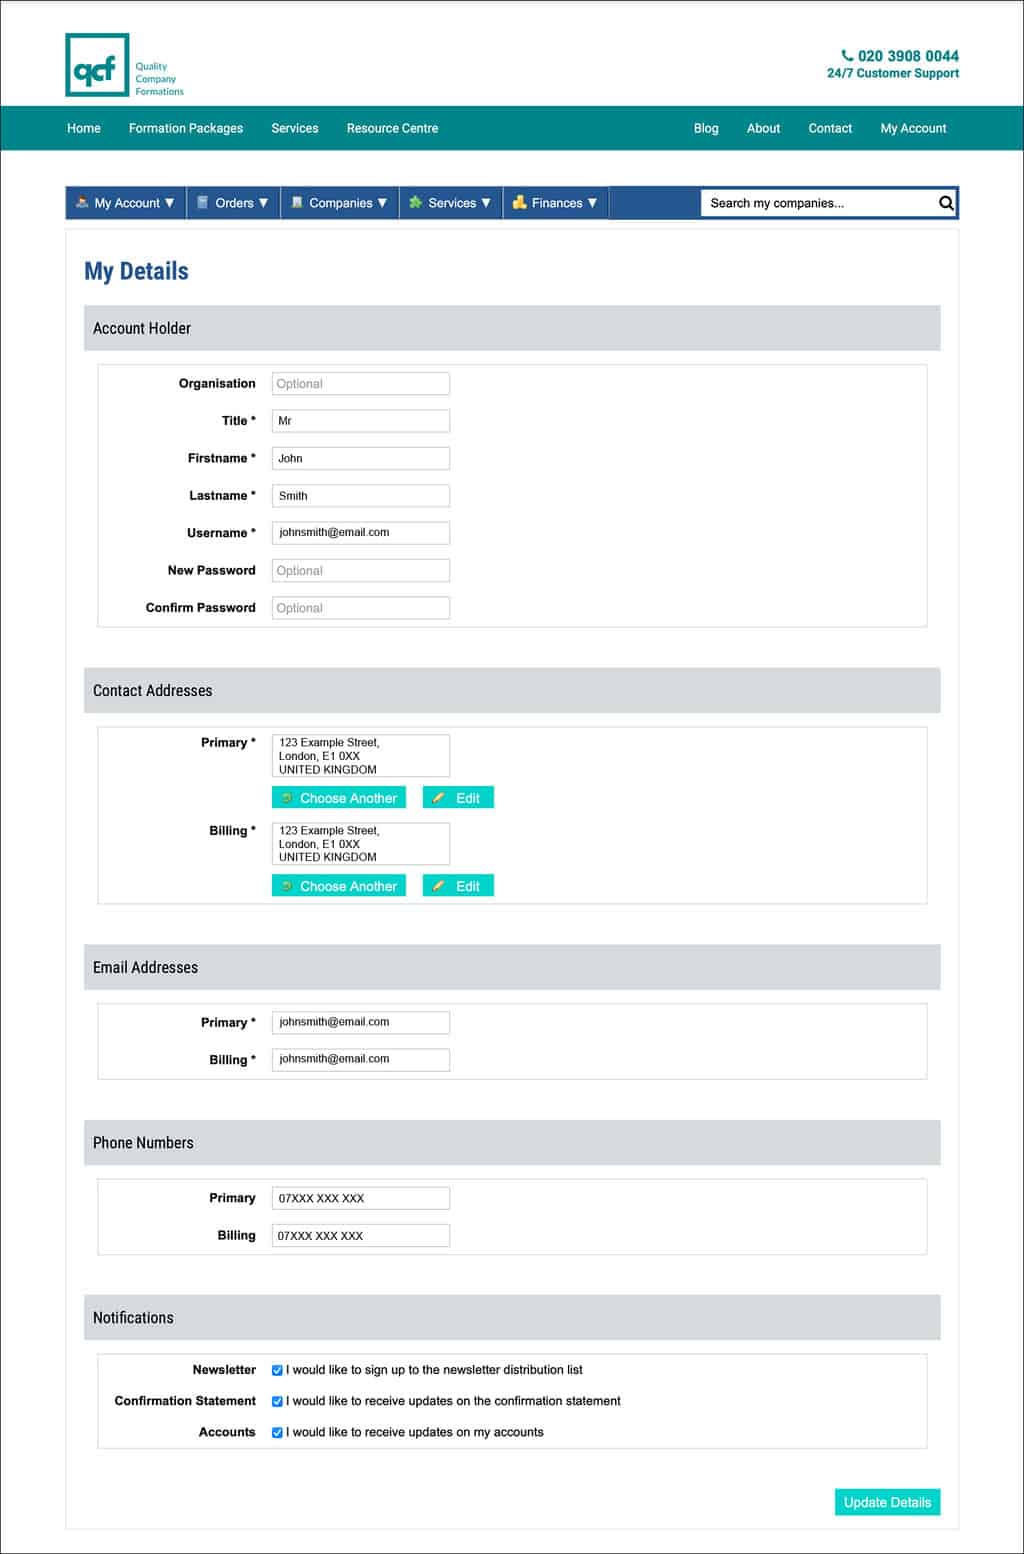
Here’s where you can update information about the account holder (the person who formed the company with us). You can review and change any of the below information:
- The organisation of the account holder
- Account holder’s title
- Account holder’s name
- Username
- Password
- Primary contact address
- Billing address
- Primary email address
- Billing email address
- Primary phone number
- Billing phone number
- Notification settings – this allows you to opt-in to our newsletter, and switch on and off confirmation statement and annual account notification emails (these reminders are sent out as your due dates approach)
My Companies
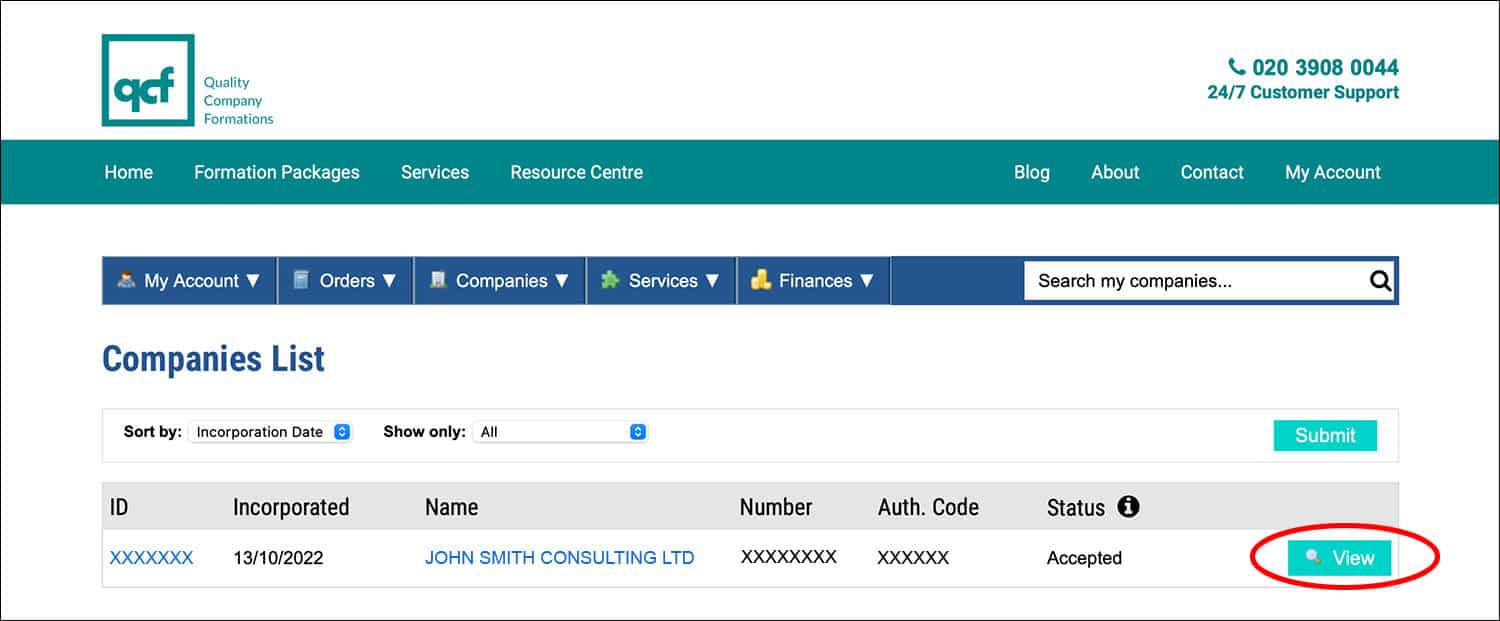
From here, you will see any companies that you have formed with us, as well as any that have been imported (more on this shortly). Select ‘View’ next to the company that you wish to work on.
You will now be taken to the main area for managing your limited company, where you will be immediately presented with the following:
- Company name
- Company registration number
- Auth. code (also known as the webfiling authentication code)
- Company type
- Company jurisdiction
- Registered office address
- SIC code(s)
- Due date for the confirmation statement
- Due date for company accounts
- Made up to date for previous company accounts
- Reference date (also known as the accounting reference date)
- The names of all directors, secretaries and people with significant control
- Company statement information
- The names of all shareholders and information about the shares that they hold
- Company documents, including the memorandum and articles of association, and share certificates (via the ‘Documents’ tab at the top of the page)
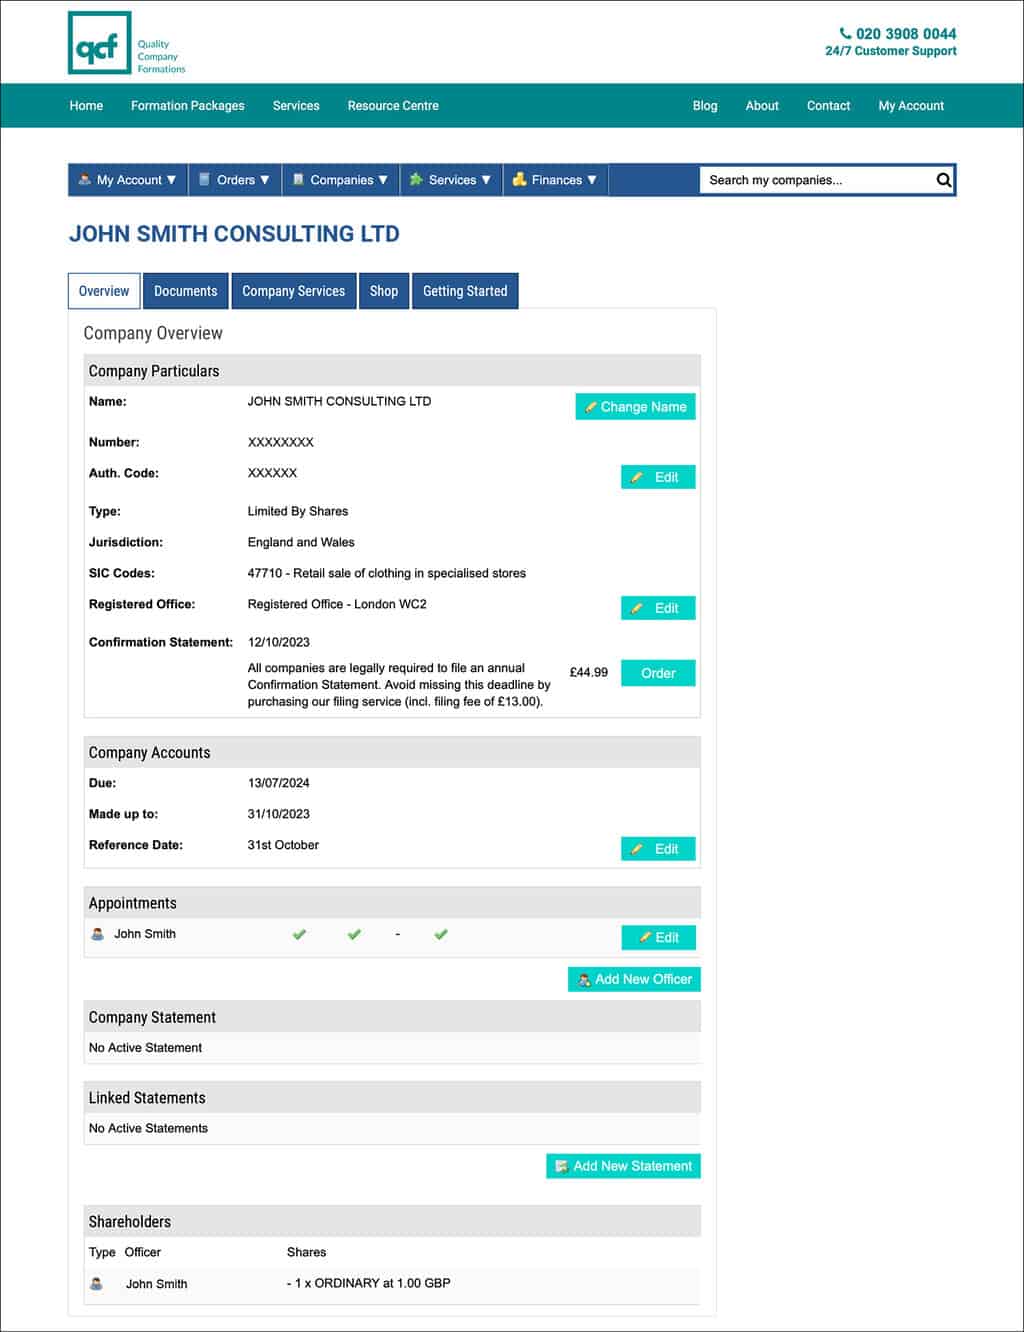
As well as being able to view the above company information, you can also make changes to your company. These changes then sync up with Companies House. You can:
- Update the company name (£69.99)
- Update the registered office address
- File a confirmation statement (£49.99)
- Update the reference date
- Notify Companies House of a new director, secretary or person with significant control
- Notify Companies House of an update to an existing director, secretary or person with significant control
- Notify Companies House of the removal of a director, secretary or person with significant control
By selecting the ‘Shop’ tab, located at the top of the page, you can purchase services for your company (such as the Registered Office Address Service and Dormant Company Accounts Service). You will be presented with a list of our services and the option to add any that you want to your cart – you can then complete the payment at the checkout.
Plus, you can also browse our dedicated partner offers through the ‘Getting Started’ tab. This includes the facility to choose a business bank account, pick up a card acquiring service, and sign-up for accounting software. Simply select ‘Add to Cart’ next to the offer that you would like to take advantage of – you can then complete the checkout process (however, payment is not required).
My Order History
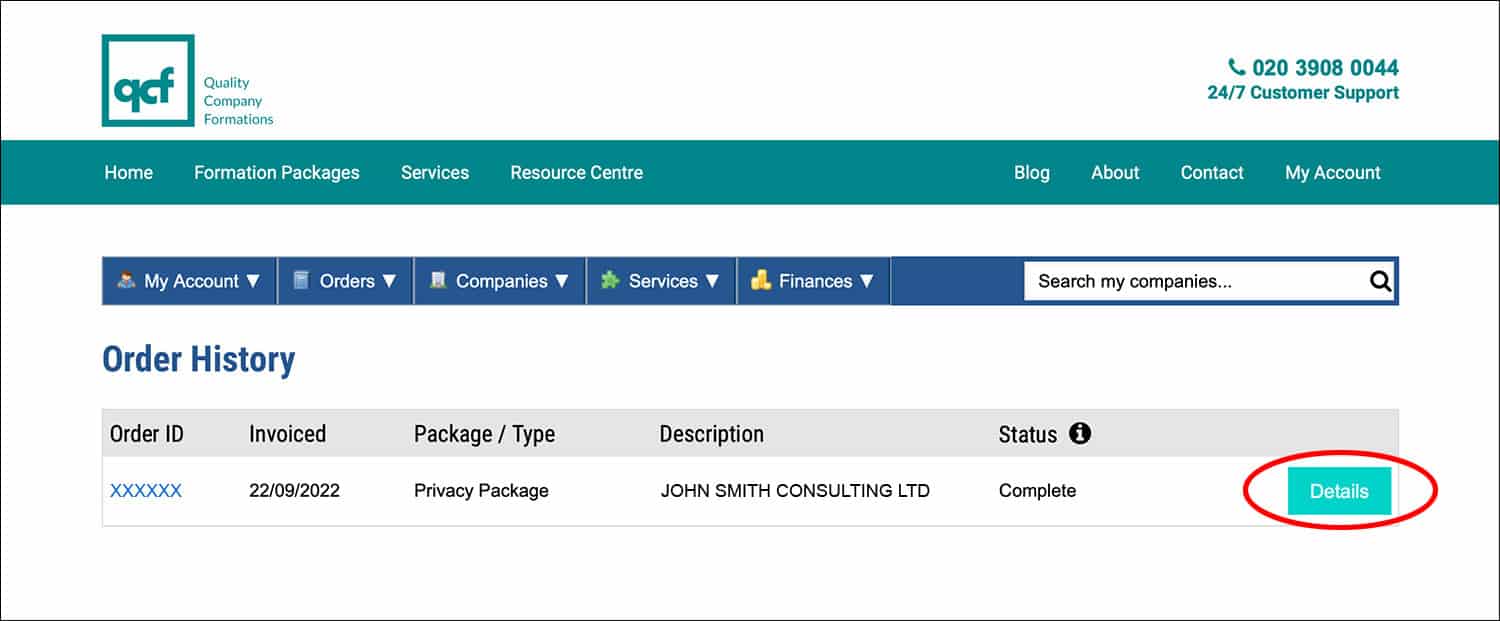
As you would expect, this is the section where you are able to view the different orders that you have made with QCF. Select ‘Details’ next to the service that want to look into.
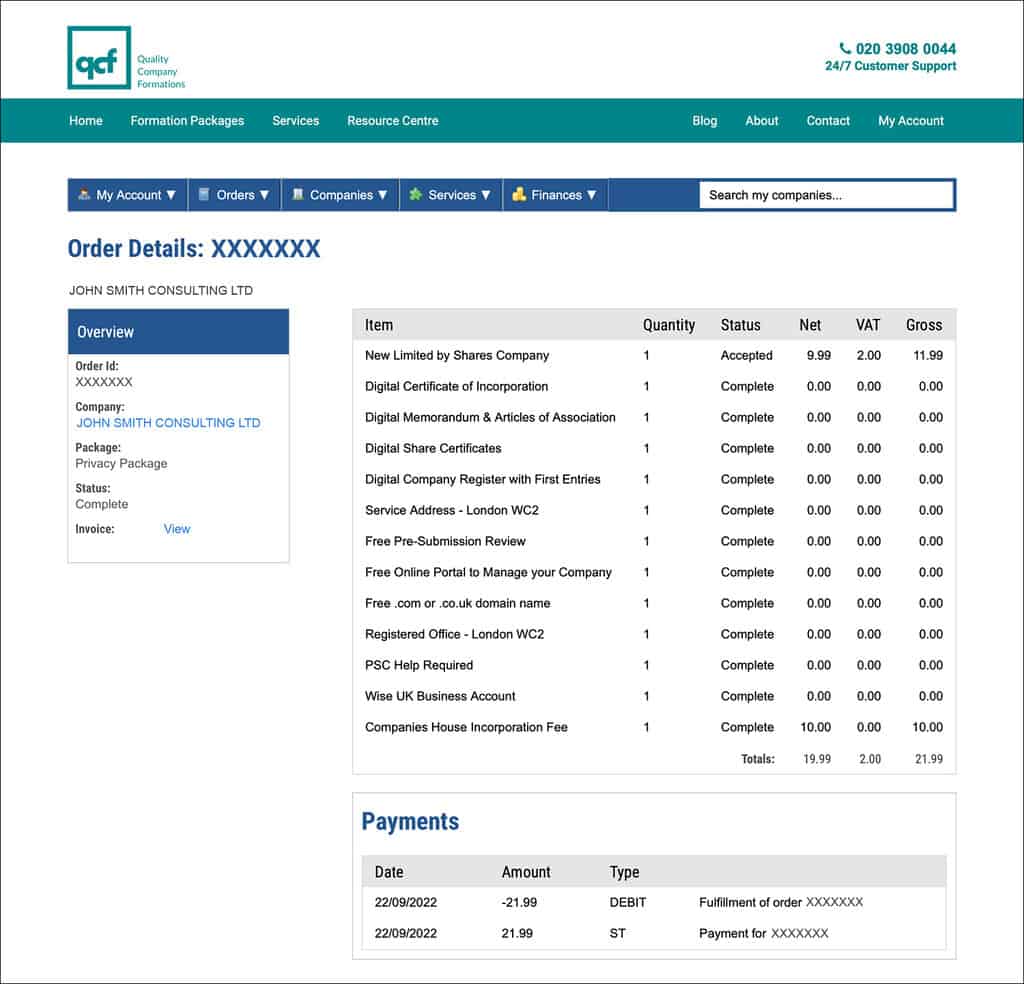
You can then see how that particular order was broken down.
My Mail
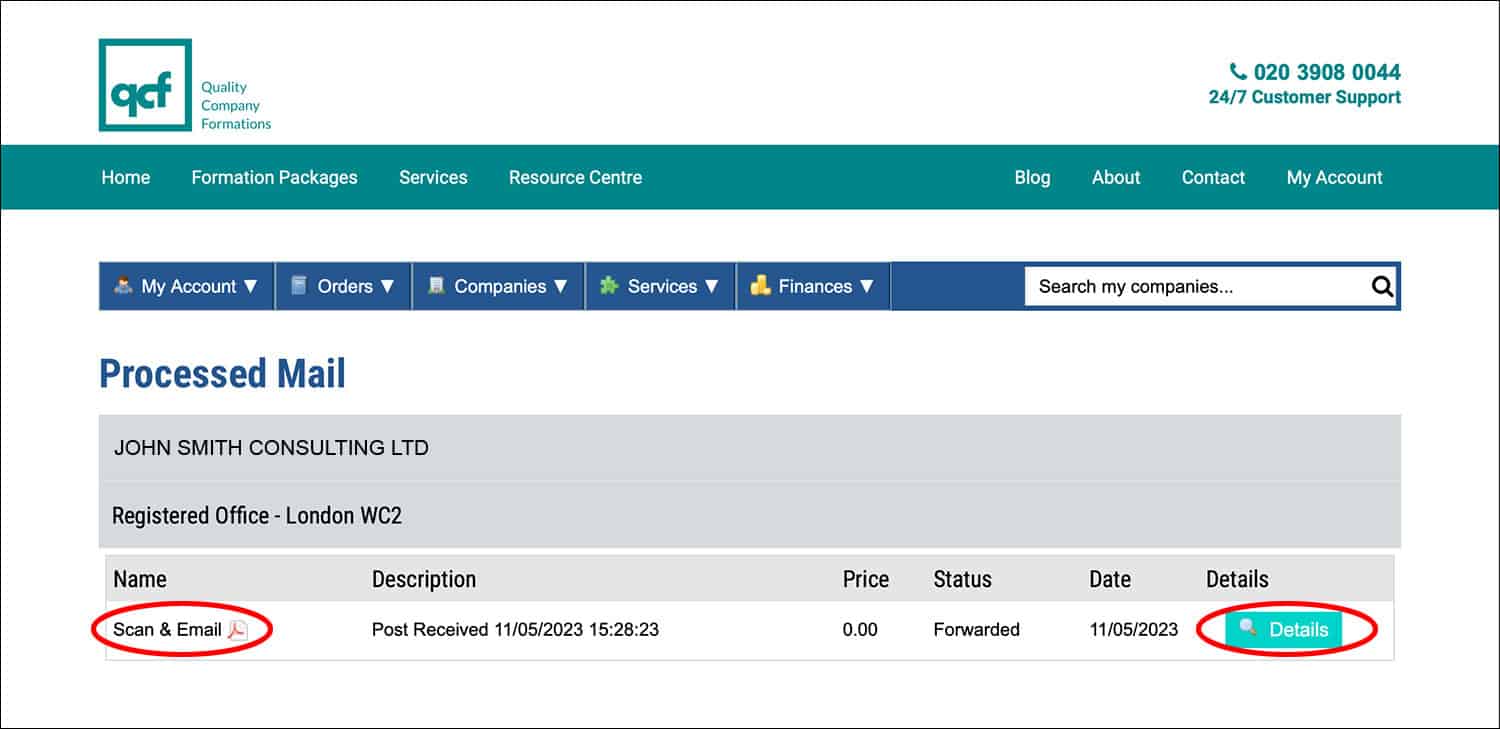
If you have an address service with us – such as the Registered Office Address Service or Director’s Service Address – we will securely open and scan your mail from Companies House, HM Revenue & Customs, the Information Commissioner’s Office and other government agencies.
As well as these scans being emailed to you, you can access them from here whenever you want. Also, if you have our Business Address Service and have opted to have your mail scanned and emailed, you can find those scans here too.
Select the PDF icon or ‘Details’ button to view your chosen document.
My Invoice History
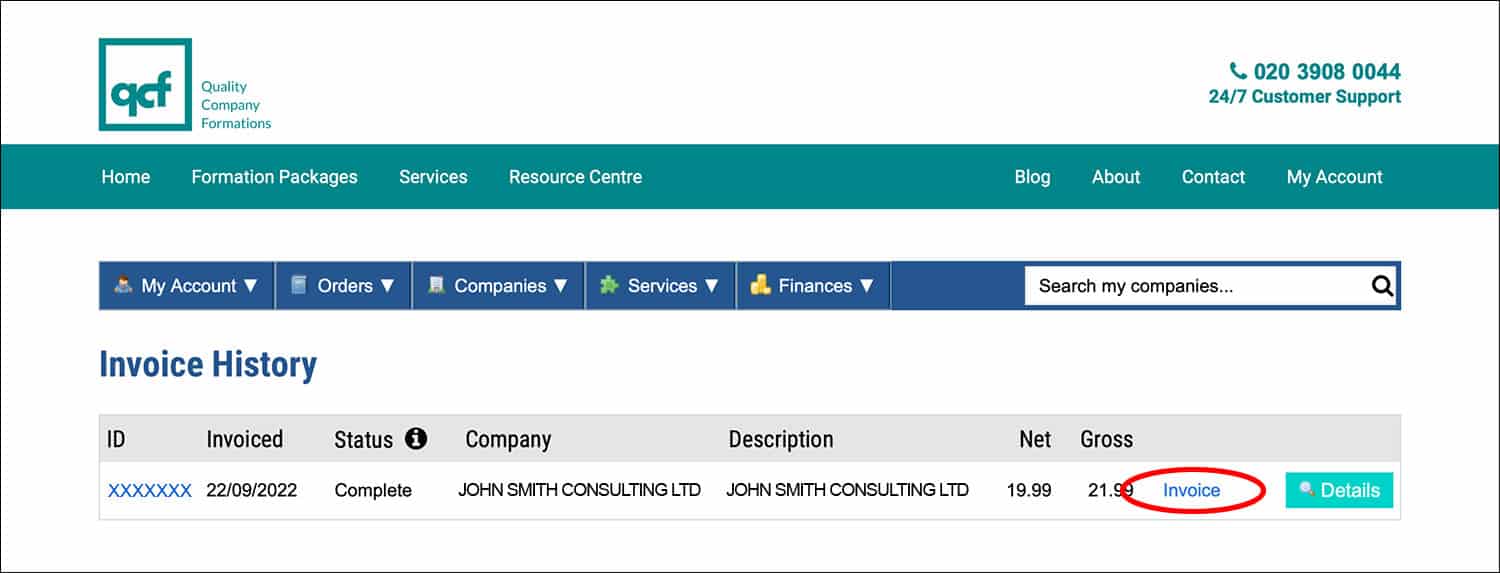
If you need to view (and download) an invoice from a service that you have with us, visit this section and click on the ‘Invoice’ link. The invoice will then be presented to you.
My Services & Renewals
All of your renewable services with us, such as any address services, can be viewed and managed here.
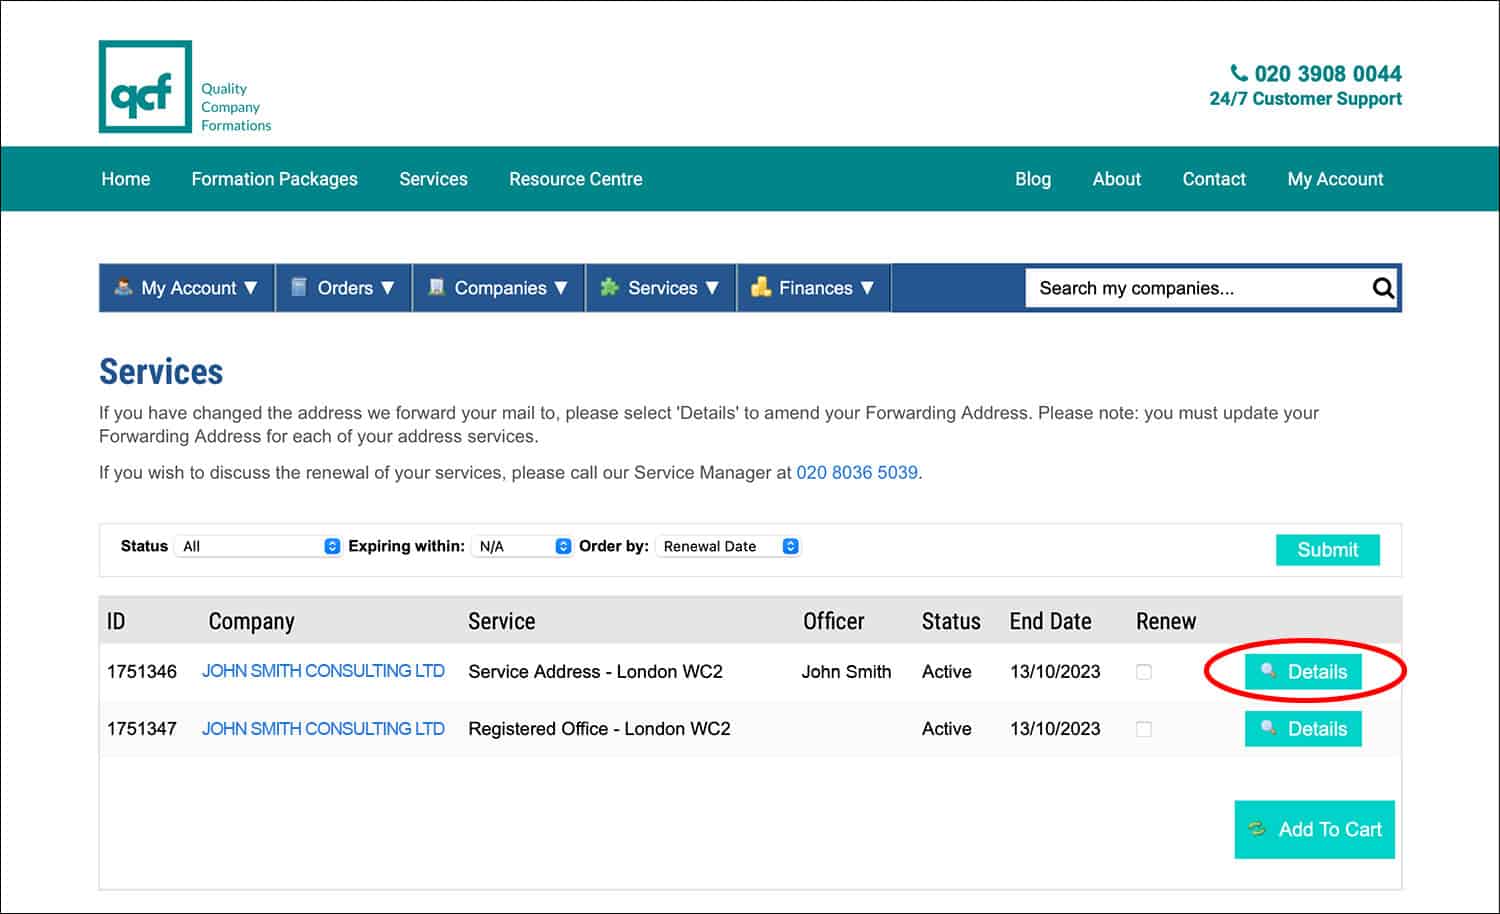
Importantly, this is where you need to go to update your forwarding address with us (relevant if you have a Business Address Service whereby we forward all your mail, or you have the Registered Office Address Service or Director’s Service Address, and we have received an item of mail that must be forwarded on – such as a cheque). To update the forwarding address, select ‘Details’ next to the appropriate service.
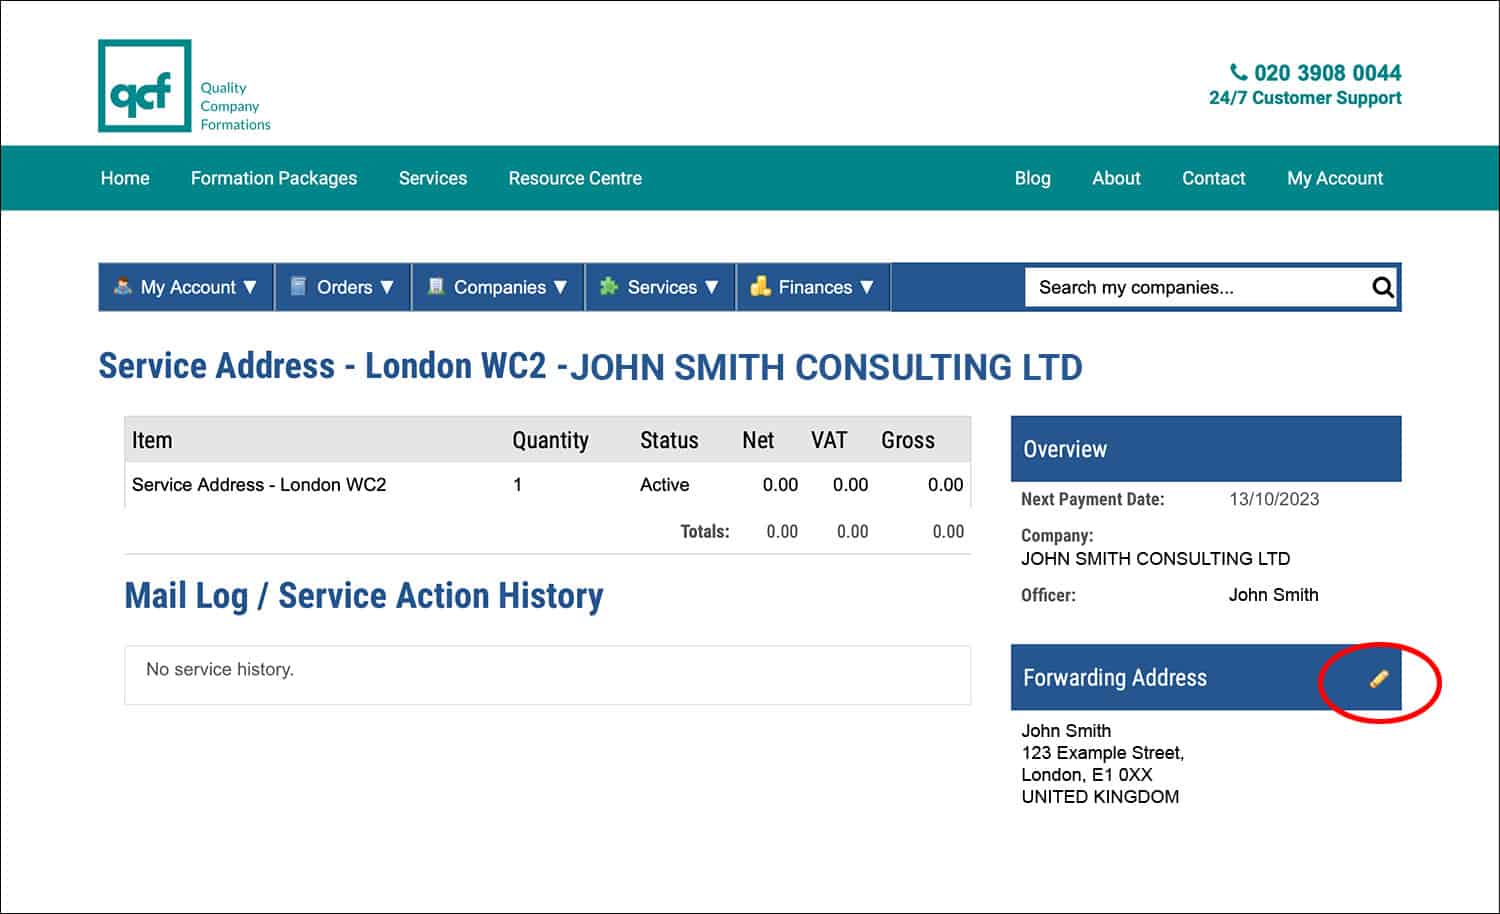
Then, from the ‘Forwarding Address’ section, click the pencil icon and proceed to enter the new address. Repeat this step for all the address services that you have.
Card Management
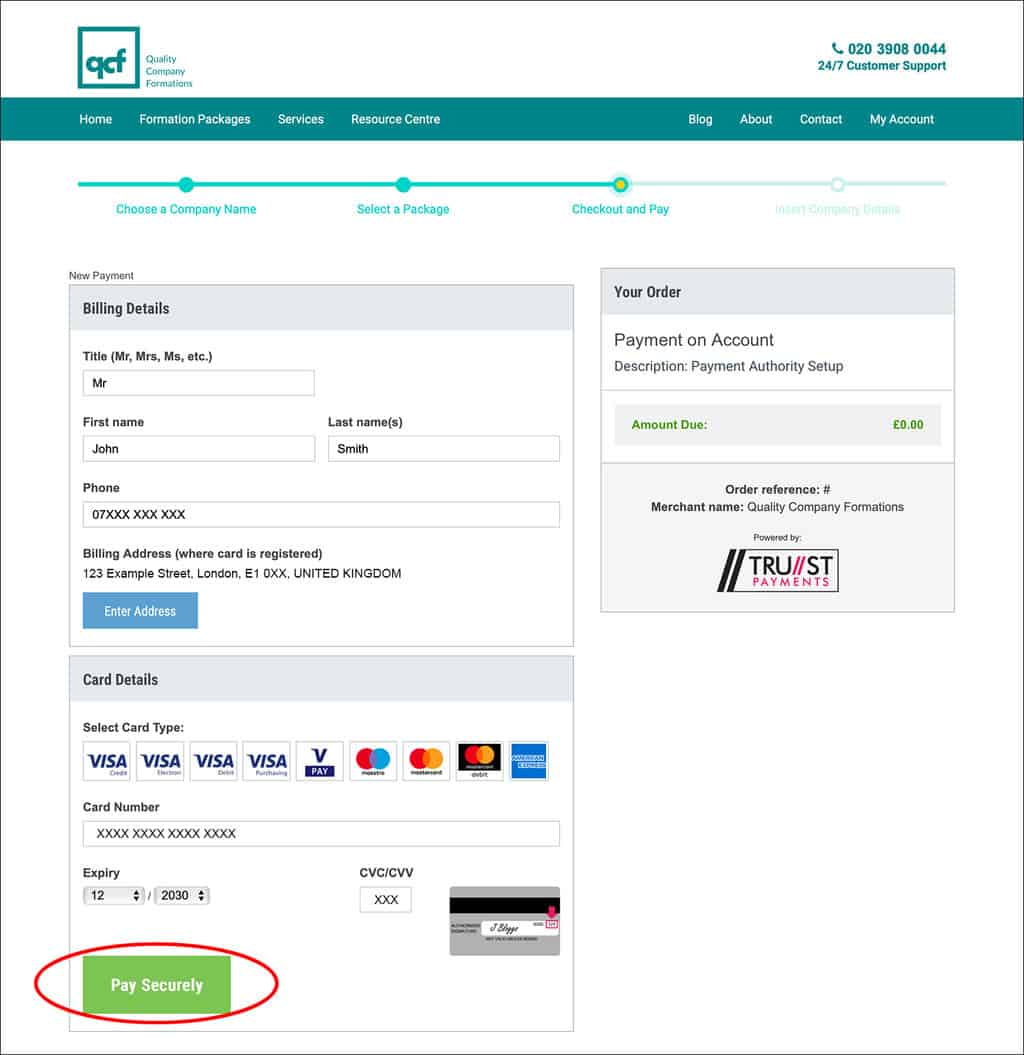
From time to time, you’ll probably need to update the card information on your account. To do this – from the ‘Card Management’ section – agree to the terms and conditions and select ‘Set up Payment Authority’.
You can then enter the information for the new card. Once you have done this, select ‘Pay Securely’ – don’t worry, no money will be taken from your account. This new card will then be displayed as your ‘Primary Card’, and you can remove any cards that are no longer required.
Import a Company
As well as being able to manage the companies that were formed by us, the Client Portal also allows you to import limited companies that were formed elsewhere. This is particularly helpful to anyone who needs to take care of the admin for multiple companies. All you need to do to import a company is enter the company registration number and authentication code, and select ‘Search’.
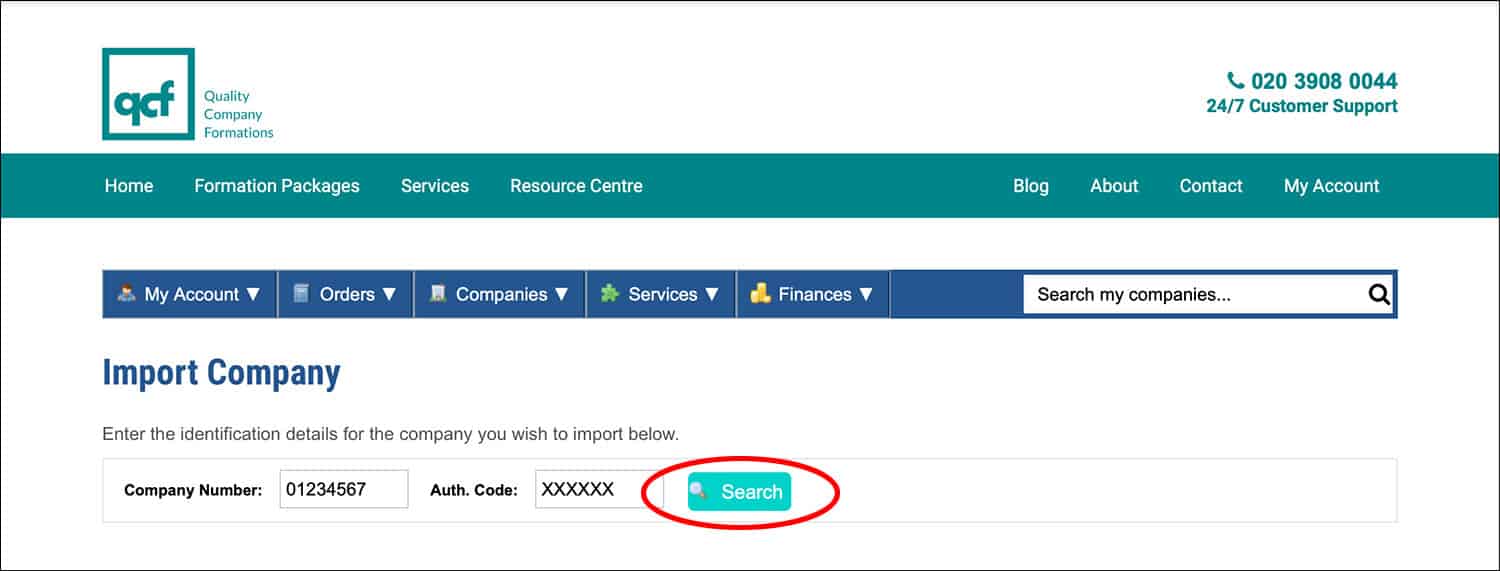
Review the company information that you see and then confirm the action by selecting ‘Import’. The company will then be imported and will become accessible from the ‘My Companies’ section.
Thanks for reading
So there you have it, how to use your Client Portal. This tool is the perfect one-stop shop for looking after your limited company and managing the services that you have with us.
Log in now to see just how easy it is.
We hope you have found this post helpful. If you have any questions about the Client Portal, please let us know with a comment and we’ll get back to you as soon as possible.
Please note that the information provided in this article is for general informational purposes only and does not constitute legal, tax, or professional advice. While our aim is that the content is accurate and up to date, it should not be relied upon as a substitute for tailored advice from qualified professionals. We strongly recommend that you seek independent legal and tax advice specific to your circumstances before acting on any information contained in this article. We accept no responsibility or liability for any loss or damage that may result from your reliance on the information provided in this article. Use of the information contained in this article is entirely at your own risk.




Join The Discussion